We completely agree that the kitchen is the heart of the home and having new cabinets makes everything feel new.
But why order a whole new kitchen if you are happy with the design, and the cabinets themselves are still in good condition?
More and more people are looking to changing the appearance of the cabinets they already have, updating the room and saving thousands of dollars in the process.
Refinishing kitchen cabinets has become a popular way to update your kitchen and freshen up the room without going to the unnecessary expense of a whole-kitchen rebuild.
At the moment, it seems everyone is doing it—and why not?
Whether you try it yourself or end up hiring a professional to make sure you don't mess up any crucial stage in the process, refinishing often makes so much more sense than rebuilding.
If you are thinking about the do-it-yourself approach, there are plenty of ways for this project to go wrong.
Once you have ruined your kitchen cabinets you will be left with no choice but to opt for a costly re-build.
Here are 10 common mistakes to be aware of if you want to avoid falling into this trap.
1. Don't Mix Up Your Doors
To wrap or paint your doors properly, you will have to take them off their hinges.
It all looks really straightforward, but once the doors come off your kitchen turns into a puzzle.
Some of the doors appear identical, and different sizes for different cupboards will leave you scratching your head.
Once you have all the doors in one pile, you will be surprised how similar they all look.
It can be almost impossible to tell the back from the front, let alone which side the handle goes on and which cabinet it belonged to in the first place.
Take a tip from the experts and make sure you label all your doors, including where they came from, which way up they go and which side is the front.
This way, you can save many hours of head-scratching as you try to fit together an impossible jigsaw or, even worse, damage a door by trying to force it to fill a space it was never designed to fit.
2. Don't Leave Ugly Holes
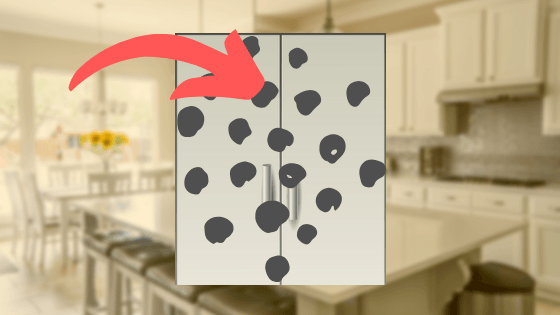
You may need to repair some holes or chips from general family wear and tear, or you may have chosen new handles that have different fixings.
Either way, it is important to remember to fill in those holes before you even begin to prepare the surface properly for painting.
To do this, you need to think about the paint you have chosen to use.
There are plenty of wood-fillers available, and you need to select the one you know will react well with the paint you have chosen to use.
If in doubt, ask the staff at the hardware store and they will be able to check.
There should be clear instructions with the product, but you will need to sand down inside the hole as thoroughly as possible to give the putty something to cling to.
Next, use your fingers or a knife to spread the putty into the hole and pack it in as much as you can.
Finally, smooth the area down with sandpaper until you achieve a flat surface.
For a larger surface, placing the sandpaper around a block of wood will give you a flat area to help you avoid any ripples or scars.
3. Don't Scrimp on Sanding
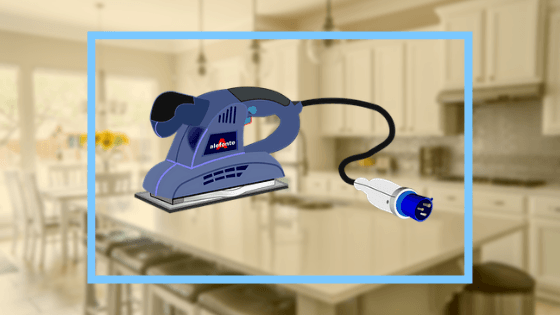
Once you have filled any marks on your doors, it is vital that you prepare the surface properly or paint will simply not stick.
There can be nothing worse than wiping down your beautiful new doors only to find that half the paint has come off on your cloth and the door is now an ugly mixture of the old and new colors, like a tie-dye experiment gone wrong.
Another common issue is finding all kinds of unsightly bumps and rough spots only after the paint dries.
Using fine-grain sandpaper and making sure you cover every part of the door makes the surface a little rough, giving paint or adhesive something to stick to.
It's really hard to tell which spots will be problematic, so you need to make sure you sand everything thoroughly.
4. Don't Paint With a Brush
Painting your units is probably the most popular way to brighten up your kitchen, but it is a real mistake to try to save dollars by skipping on specialist equipment.
Paint sprayers are made for precisely this kind of job.
You really need to spray the paint on as this will make for the best finish.
Painting with a brush means you can't ensure even coverage and you will leave behind brush marks, or even loose hairs from the brush itself.
It's very difficult to get into grooves and around edges with a brush without leaving an untidy, tell-tale bulge.
Spraying is the only way to make sure your paint goes on evenly and the surface will be perfectly smooth.
Spraying works well with all finishes, giving you a wider range of options as shiny, gloss or semi-gloss, or even flat paints still work well.
5. Don't Forget to Clean Cupboards First
Even if you clean your units regularly, you will need to wipe everything over before you think about wrapping or painting.
First of all, you need a good degreaser to make sure everything is removed from the surface.
Even sanding might leave some spots untouched, so it is vital that you have cleaned every area very effectively.
Water-based paint will not stick on a cabinet door that was previously oiled, so you will need to strip down every part of the cabinet as thoroughly as possible.
If you are using an oil-based paint, you may find it helpful to wipe down the units with a paint thinner.
This will be an important step before sanding if the units might have already been painted.
6. Don't Skip the Primer
We all know how tempting it is to get started with the final color, even telling ourselves we could add an extra coat or two instead of using a primer.
This is a rookie mistake that you will regret in a few months' time.
Yes, the initial finish might look just as good...at first.
Before long, any knots in the wood or chips beneath the surface will start to bleed through the paint, forming stains that won't shift and an intricate pattern you could do without.
Choosing a quality primer is vital to form that all-important layer between the natural blemishes in the wood and the paint itself.
It's the only way to keep your finish looking smart for years to come.
7. Don't Work Outside
Even in fine weather, working outside can be dangerous when working on kitchen cabinets.
It is right to take them out of the kitchen, and you can be forgiven for wanting to spray paint outside where any residue is less of a problem.
But there are hazards to painting outside that you might not have thought of.
Painting kitchen cabinets is a tricky business.
While the sun helps dry the cabinets more quickly, there is far too much risk of debris landing on the doors while the paint is still wet.
Even on a very still day, dust can be blown up by simply walking nearby and small insects can easily fly into the paint, meeting an early demise.
Imagine cleaning down your sparkling kitchen to find the legs and wings of a dead fly, immortalized in your paintwork forever!
You still need plenty of space, but a large garage or even the kitchen itself, with plenty of protection for the floor and other furniture, is a much better option.
Of course, if you don't have the space, or you don't want to risk over spraying onto your living space, then the best option is a professional spray booth.
If you don't want to risk messing up this crucial stage in the process, give Scholtens & Baltus a call at (905) 680-4799, and we can take care of the painting using our spray booth.
8. Don't Forget Ventilation
So, you've taken our advice and started painting inside, but here is another potential problem to avoid.
Whatever paint you use, you need to make sure the room you are using is well ventilated.
This is especially important if you are stripping the cabinet doors with solvents.
If air is not allowed to circulate it can make the paint dry unevenly, affecting the quality of the finish.
More importantly, the lack of ventilation can cause problems for your health.
Breathing in fumes from some paints and varnishes used on cabinets can cause potentially fatal respiration problems.
Solvents used in paints can cause headaches and nausea, at the very least.
For best results, you need to paint in a well-ventilated room with windows open on more than one side so air can travel through.
To increase ventilation, you can use electric fans to improve circulation.
For this to work, you need to identify which direction the breeze is blowing into your room.
Place one fan in the window where the enters, facing into the room. Place the second fan in a window or doorway opposite, pointing out of the room.
This way, the air is encouraged to move directly through the room, taking the harmful solvents with it.
If you are getting professional help, why not go with a company that uses safer, cleaner, more sustainable materials?
9. Don't Damage the Finished Product!
Once the cabinets have been painted and dried, you may think the hard work is over. Don't underestimate what is to follow! Handling newly painted cabinets can be fraught with dangers and it is so easy for a cabinet to slip out of your hands and become damaged. Similarly, scratches and chips could happen easily just by moving the cupboard door back into the kitchen and resting them gently on the floor. To avoid this, prepare the storage area before moving the cabinets by placing sheets or towels to form a soft, padded surface to rest the cupboards upon. Be very careful when using tools such as screwdrivers to replace hinges and door handles.
10. Don't Forget the Hardware
Your newly painted or covered units have transformed your kitchen.
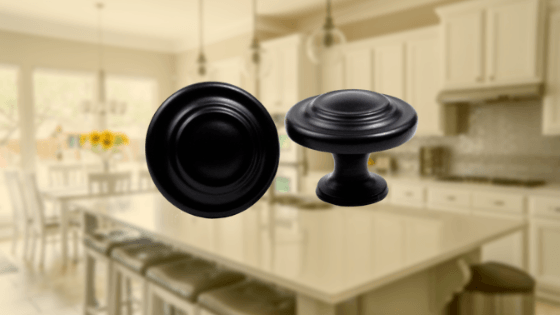
Does it make sense to replace the hardware that matched the original?
Those traditional handles might have looked perfect when your doors were a traditional oak, but they are unlikely to match now that they are a chic, glossy gray.
Putting back the old hardware is the biggest mistake in kitchen makeovers, and one of the most frustrating since updating this part of the kitchen is simple and costs very little.
If you are worried about drilling holes for new fittings, you can even paint the original hardware to match the new colors in your room.
Conclusion
Refinishing your kitchen cabinets can have an amazing effect on the overall look and feel of your home.
The kitchen is the heart of the home, so it makes sense to do it right when you want to renew your look.
If it sounds like a lot of work, that's because it is. But it's nothing like the cost and effort of completely remodelling your kitchen.
Besides, if the kitchen is functional, why fix what isn't broken?
For a low-cost alternative to kitchen renovation, give cabinet painting a try.
Scholtens & Baltus has been updating kitchens just like yours for decades, so we've got the tools and expertise to make sure your kitchen refinishing is a smooth and truly satisfying process.
Curious about what that would look like for your kitchen? Give us a call for a no-obligation estimate.
MAKE YOUR Kitchen FEEL BRAND NEW AGAIN.
© 2019 , Scholtens Baltus Furniture Refinishers. All rights reserved.
Serving St. Catharines, Niagara, Hamilton, Beamsville, Grimsby, Stony Creek, and surrounding areas. Give us a call to find out more!
Made with True Marketing
